Are you worried about the cleanliness of your commercial HVAC ductwork? It can be hard to know what to do and how to go about cleaning it, but don’t worry – we’ve got you covered! In this article, we’ll take a look at all the steps involved in properly cleaning your commercial HVAC ductwork. From assessing the system and assembling the necessary tools and materials, to prepping the area for cleaning, removing debris and dust, and finally reassembling the ductwork – we’ll cover everything you need to know. So let’s get started by taking a closer look at how to properly clean commercial HVAC ductwork.
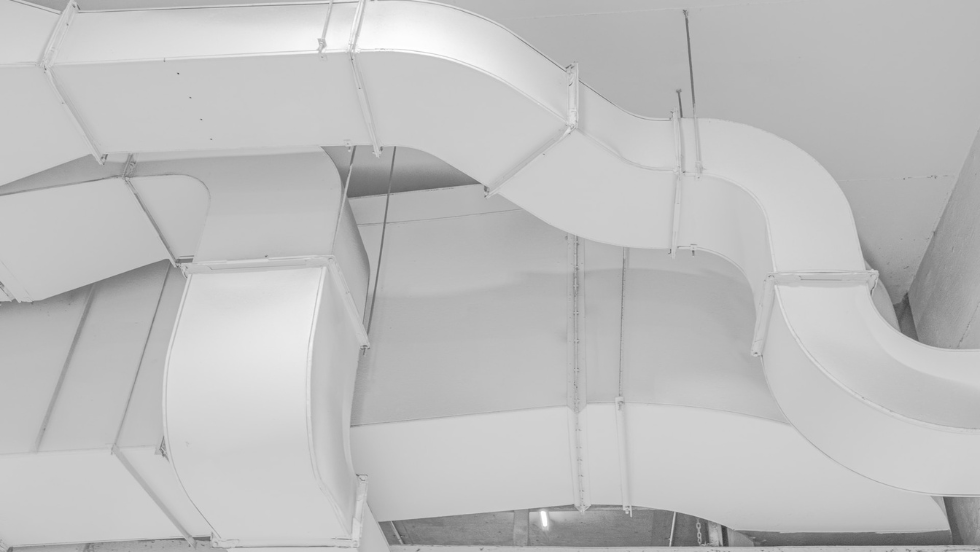
Assessing the Ductwork System
Assessing the duct system is essential in determining how best to proceed with its upkeep. Before any cleaning takes place, a thorough inspection of the system should be done. This includes checking for signs of damage or corrosion, as well as inspecting the insulation and joints. If any air leaks are found during this process, they must be sealed before moving forward with cleaning. Furthermore, it’s important to consider the type of HVAC system you have and what type of debris could potentially accumulate in its ducts.
The next step is to determine if a professional cleaner is needed or if you can handle the job yourself. Professional cleaners will typically have specialized tools that allow them to access hard-to-reach areas and perform a deeper clean than what could be achieved without such equipment. However, there are many DIY alternatives available for those who want to save some money on their cleaning costs. These include using a vacuum cleaner fitted with an appropriate filter or even using compressed air to remove dust particles from within the ducts.
No matter which route you choose for cleaning your commercial HVAC ductwork system, it’s important that proper safety protocols are followed throughout every stage of the process – from assessment through completion – in order to ensure maximum efficiency and protection against potential hazards like mold growth or fire risks caused by dust buildup.
Assembling the Necessary Tools and Materials
Gathering the right tools and materials is essential to ensure a successful outcome in any project. Before beginning to clean commercial HVAC ductwork, you should make sure you have the following items on hand:
- Safety Goggles: These will protect your eyes from any dust or debris that may be kicked up during the cleaning process.
- Vacuum Cleaner: Make sure to use one with a HEPA filter so that all allergens and dust particles are effectively removed from the air ducts.
- Scrub Brush: This will allow you to more easily reach into tight spaces for deep cleaning of the air duct system.
Having these tools ready ahead of time can save time and effort when it comes to actually starting your cleaning project, as they allow for an efficient workflow without having to stop and gather supplies mid-way through the job. Once you’ve gathered what you need, it’s time to get started! Ensure that there is adequate ventilation when working with chemical cleaners or solvents, and make sure not to over-scrub or damage any surfaces while cleaning. With proper preparation and care, your commercial HVAC ductwork will be looking good as new in no time!
Prepping the Area for Cleaning
Now that you have the necessary tools and materials, it’s time to get prepped for cleaning! First, make sure any personal items such as clothing or jewelry are removed from the immediate area. This is important because you don’t want anything getting in the way of your cleaning process. Next, take some time to inspect the ductwork for any damages or foreign objects that may be blocking airflow. If any damage is found, consult a professional before continuing with cleaning. Lastly, move furniture and other obstacles away from the area so that you can access all parts of the ductwork easily and efficiently. It’s also helpful to put down protective coverings over floors in case dust or debris kicks up during your work. The last thing you want is a mess left behind when finishing up! With a clean workspace ready, you can now start on those ducts with confidence and efficiency.
Removing Debris and Dust
Ready to get down to business? Let’s start removing the debris and dust from those ducts! To get started, you’ll need a few items:
- A vacuum cleaner with a HEPA filter
- An extendable brush or crevice tool
- Safety glasses
- Disposable gloves and protective clothing
Now that you’re all set up, it’s time to start cleaning! Begin by sucking out any loose debris using your vacuum cleaner. This should be done from the air vents to make sure no particles escape back into the room. Be sure to empty the vacuum bag regularly and replace with a new one when necessary. As well as getting rid of dirt and dust, this will also help reduce odors in the area.
Once all loose matter has been removed, use an extendable brush or crevice tool to remove any residue stuck onto the walls of your ducts – this is usually easier than trying to vacuum it out! While doing so, remember to wear safety glasses at all times and pay close attention not only for potential hazards but also for any signs of damage that may need repair before continuing further with cleaning procedures.
Finally, once you’ve finished brushing away all that gunk, don’t forget to dispose off your disposable gloves properly and take off any protective clothing before leaving the site – just because there’s no mess doesn’t mean you shouldn’t still take safety precautions!
Cleaning the Ductwork with a Vacuum
Armed with a vacuum cleaner equipped with a HEPA filter, an extendable brush or crevice tool, safety glasses, and protective clothing, it’s time to start tackling the debris and dust within the ductwork. Vacuuming is a simple and effective way to remove dust buildup from your HVAC system. It’s important to note that vacuums are not designed for use in ventilation systems; therefore, make sure you use equipment specifically designed for the job.
When using a vacuum in ductwork, first make sure all vents are closed off so that no air escapes during cleaning. Before beginning work on the ducts themselves, use the vacuum attachments to clean out any access panels or registers. This will help ensure that you can access as much of the ductwork as possible without having to disassemble components of your system.
| Once all vents are securely closed off and any access points have been cleared out using your vacuum’s attachments, carefully insert your hose into one side of each section of ductwork being cleaned. Begin slowly moving the hose back and forth throughout the length of each section while running your vacuum at its maximum power setting. Make sure you keep an eye on both ends of each section being cleaned so that you don’t miss any areas where debris may have collected inside corners or crevices. | Action | Result |
|---|---|---|
| Close off all vents | No air escapes during cleaning | |
| Clean out access panels/registers | Access as much ductwork as possible without disassembly | |
| Carefully insert hose into one side of each section | Start moving back & forth while running on max setting | |
| Keep an eye on both ends of sections being cleaned | Don’t miss areas with debris in corners/crevices |
Cleaning with a vacuum is an important part of maintaining your HVAC system’s efficiency levels – it should be done regularly to prevent buildups from negatively affecting performance over time. Always refer to manufacturer instructions before attempting any kind maintenance procedure on commercial HVAC systems; following these steps closely will help ensure safe operation when cleaning out dust deposits from commercial HVAC ductwork systems.
Cleaning with a Brush and Cleaning Solution
Take a deep breath, don your protective gear, and get ready to tackle those tough dust deposits in your commercial HVAC system with a brush and cleaning solution. It’s important to choose the right type of brush for the job. A stiff-bristled nylon brush is best suited for larger areas while a soft-bristled brush works better on smaller areas. Be sure to use specialized solutions formulated specifically for ductwork, like antimicrobial cleaners or degreasers that are safe to use around the family and pets. Once you’ve selected a cleaning method, it’s time to get started.
Start by brushing away any loose debris from the inner walls of your ductwork – this will help reduce airborne particles when you start spraying down the surfaces. Take extra care when working near sensitive components like electric motors or control panels; only use a dry cloth to remove dust as water can cause electrical failure if it seeps inside them. Before spraying down the entire surface area with cleaner, test it out in an inconspicuous spot first – this helps ensure there won’t be any discoloration or staining after application.
Once you’ve prepped your work area and tested out the cleaner on a small patch, spray down all interior surfaces thoroughly before using a damp cloth or sponge to wipe away any remaining dirt and grime. Rinse off any excess cleaner with clean water before drying off all surfaces completely with another cloth or rag to prevent mold growth within your ductwork system. With these steps taken care of, you can sit back knowing that not only have you cleaned up your commercial HVAC ductwork but also done so safely without putting yourself at risk!
Reassembling the Ductwork
Gather your materials and prepare to reassemble your ductwork, ensuring a safe and secure installation. First, make sure all the parts are still in good condition and fit together properly. Check for any signs of damage or wear on the components that you cleaned. Any parts that need to be replaced should be done before reassembling. Make sure all the bolts are securely tightened so that no air leakage occurs when running the system.
Once ready, carefully begin to rebuild the ductwork with each component connected securely with an appropriate sealant or adhesive. Pay special attention to corners and bends in order to ensure efficiency; if not sealed correctly, it will result in air leakage which can cause energy loss and noise pollution. Take into account measurements of each part as well; too much or too little space between components can also lead to inefficient operation of your HVAC system.
When you have finished rebuilding the ductwork, test it out by turning on the HVAC system and checking for any leaks or abnormal noises from the vents. If everything is working properly then you’ve successfully cleaned and reinstalled your commercial HVAC ductwork!
Maintaining Clean HVAC Ductwork
Keeping your ductwork in good condition is essential for efficient operation of your system, and regular maintenance will save you time and money in the long run. To keep commercial HVAC ductwork clean, here are a few key steps:
- Inspect the exterior and interior of all ducts for any signs of damage or deterioration.
- Clean the interior walls with an appropriate cleaning agent to remove any dust or dirt buildup.
- Check for any air leaks and seal them properly with mastic sealant or aluminum tape.
- Clean any filters regularly to ensure proper airflow and efficiency.
Periodically inspecting your ducts is also important to make sure they are functioning correctly. Look out for mold growth, condensation, clogged drains, dampness around joints, strange noises coming from vents, etc., that could indicate a problem with the air flow. If you notice anything out of the ordinary, contact a professional HVAC technician right away to diagnose the issue so it can be fixed as soon as possible.
Regular maintenance may seem like a lot of work but it’s worth it to keep your HVAC system running smoothly and efficiently over time. It’s also important to remember that poor indoor air quality can have serious health implications so keeping your ductwork clean should be taken seriously!
Frequently Asked Questions
What type of safety precautions should be taken when cleaning HVAC ductwork?
When cleaning hvac ductwork, safety needs to be your top priority. Wear a long-sleeved shirt and pants, gloves, and eye protection. Make sure that you also have adequate ventilation in the space you are working in. Additionally, use a vacuum with HEPA filtration to ensure that dust particles are properly removed from the air. Finally, be sure to dispose of any debris appropriately and clean up thoroughly before leaving the job site.
How often should commercial HVAC ductwork be cleaned?
When it comes to commercial HVAC ductwork, the frequency of cleaning is essential for maintaining efficiency and a clean indoor environment. Depending on the type of business you operate, your ducts should be cleaned at least once every 3-5 years. If you have pets or smokers in the building, these intervals should be reduced as pet hair and smoke can construct up quickly in the system. A professional HVAC technician will be able to determine the best schedule for your cleaning needs.
Are there any health risks associated with cleaning HVAC ductwork?
When it comes to cleaning hvac ductwork, it’s important to consider the potential health risks involved. Dust particles and other debris can be released into the air during the cleaning process, which can be hazardous if inhaled. Additionally, mold or mildew may form due to improper cleaning techniques or in some cases a lack of maintenance. To reduce any potential health risks, make sure you hire an experienced professional who follows safety protocols and knows how best to clean your hvac ductwork.
What type of cleaning solution should be used on HVAC ductwork?
Cleaning hvac ductwork requires the right solution to get the job done. The type of cleaning solution you’ll use depends on the type of material your ductwork is made from. Generally, a mild detergent and warm water should be used for metal, fiberglass or vinyl-lined ducts. For cloth- or paper-insulated ducts, an EPA-registered disinfectant can help kill bacteria and mold. Make sure you follow manufacturer instructions when using any cleaning solutions on your hvac ductwork.
How do you prevent dust and debris from entering the ductwork in the future?
Preventing dust and debris from entering your ductwork in the future is key to keeping it clean. The best way to do this is by regularly inspecting and maintaining your HVAC system. Make sure all filters are changed on a regular basis, as well as any other components that may be prone to collecting dust or debris. Additionally, you can install air purifiers or humidifiers in the ductwork to help reduce the amount of dust and debris that enters the system. Finally, make sure all vents are properly sealed so no outside air can enter the system. Taking these steps will ensure your ductwork stays clean for years to come!
Conclusion
You’ve done it! You’ve just successfully cleaned your commercial HVAC ductwork. Now that the job’s done, you can rest easy knowing your system is as clean and efficient as possible. Don’t forget to maintain the cleanliness of your ductwork by regularly checking for any build-up or debris. This will help ensure that you get maximum performance from your HVAC system without having to spend money on costly repairs or replacements. With regular cleaning and maintenance, you’ll be able to enjoy a comfortable environment all year round!